https://tristaterestoration.com/Hanging drywall is a tough task; however, if you are a homeowner and remodeling your home or refinishing your basement, knowing how to hang drywall perfectly can save you time and money. At Tri-State Restoration Services, we understand that the right drywall installation is the foundation of your walls for a flawless interior. If done right, drywall not only gives your wall a smooth finish but also ensures thermal insulation, soundproofing, and fire resistance in your home.
Complete Guide To Drywall Installation: From Start To Finish
When it comes to upgrading your space, the right drywall installation is the base of your walls. You need to know the tools you need, the size, and some techniques. Keep in mind that you will need someone’s help in this process because drywall sheets are heavy to lift overhead.
Let us walk you through how to hang drywall step by step:
- Materials And Tools You Need
Gather all the tools and materials needed for drywall ganging before starting drywall installation. The tools you will need include:
- Drywall sheets ( 4’ x 8’)
- Drywall screws or nails
- Screw gun or drill
- Measuring tape and utility knife
- Drywall tape
- T-square or straightedge
- Joint compound
- Sandpaper or pole sander
- A ladder or scaffolding
- Preparing The Space
Before installing drywall, ensure that the framing is complete, plumbing and electrical work are done, and insulation is in place. Use a stud finder to find and mark the wall studs, which are placed 16 to 24 inches apart. Ensure that the studs are level because uneven framing can result in gaps in the drywall.
- Measuring And Cutting Of Drywall
Measure the area you will be installing drywall with the help of a measuring tape or t-square, and purchase the sheets accordingly. Mark the cuts directly on drywall sheets with the help of a pencil, and use a utility knife to cut along the mark. For areas like outlets, windows, and doors, use a drywall saw to cut precisely.
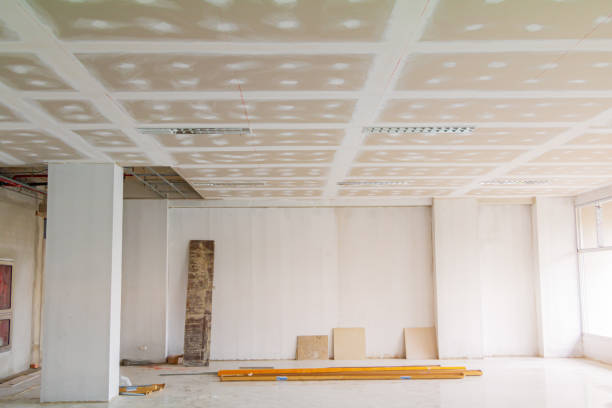
- Ceiling Drywall Hanging
Start with ceiling drywall installation because it will provide a cleaner wall-to-ceiling joint and provide a perfect base for wall drywall installation. Hoist the drywall sheets where you want to start, ensuring that the ends meet the center of a ceiling beam. Then, secure the panels with drywall screws every 12 inches along the beam. If you are working alone, use a drywall lift or T-brace to support the sheets.
- Walls Drywall Installation
When you are done with the ceiling, move to the walls. Starting from the top, place the drywall sheets horizontally with the ceiling panel. Use drywall screws or nails to attach it to studs, ensuring that they are 12 to 16 inches apart. Try to keep the edges of the drywall facing outwards, which makes taping easier.
| Pro Tip: For rooms less than 9 feet in height, install drywall horizontally across the studs for added durability and faster installation. |
- Tapping And Applying Joint Compound
Try to avoid placing sheets directly with each other; staggered joints increase the durability of the wall and minimize cracking. Apply drywall tape along all corners, then spread a layer of joint compound over the tape. Let the first coat of joint compound dry for at least 24 hours, and then apply a second and third coat.
- Sanding And Painting
When the first coat of joining compound is completely dry, use sanding paper or a block to smooth out the surface. Always wear a mask while sanding to avoid inhaling dust. Once the drywall is smooth, your walls are ready for priming or painting.
- Cleanup And Finishing
Clean all the dust, scraps, packing material, or any leftover material when you are done with the drywall hanging. Then, inspect your walls for any imperfections, and address them accordingly with joint compound, additional joint, or paint as needed. In the end, ensure that everything is smooth and flawless.
Common Mistakes To Avoid During Drywall Hanging
Avoid these common mistakes during drywall installation if you are doing it your own.
- Using the wrong screws can affect the longevity of your drywall, so use screws that are specifically designed for drywall installation.
- Do not tighten the screws too much; it can damage the drywall and reduce its holding power.
- Not staggering joints can lead to visible seams and weak spots.
- Skipping vapor barriers or insulation can affect your drywall and interior walls badly.
Conclusion
In short, drywall installation is a long and tough process, so always focus on your safety while hanging drywall, take your time with measurements and cuts, and keep assistance with you in the whole process. If you are working with larger spaces, high ceilings, or complex framing, it is advisable to seek help from professionals who ensure a perfect drywall installation that is ready for any finishing touch.
FAQs
What thickness of drywall is mostly used?
Typically, ½-inch drywall is used for most walls, and for ceilings, ⅝-inch drywall is used for added rigidity.
How long does drywall installation take?
For an average 12×12 room, hanging drywall takes 1-2 days, and finishing takes 2-3 days, depending on weather and drying time.
Is drywall fire-resistant?
Some drywall types, like Type X, are specifically manufactured for fire resistance.